Running Your Task
Once you’ve created a Task, it’s time to test and run it. This guide covers how to execute your Task through the Rightbrain dashboard.
Accessing the Run Task View
Navigate to the Run Task view to test your Task execution. You can access this directly from your dash homepage or right after creating a task.
Task run view

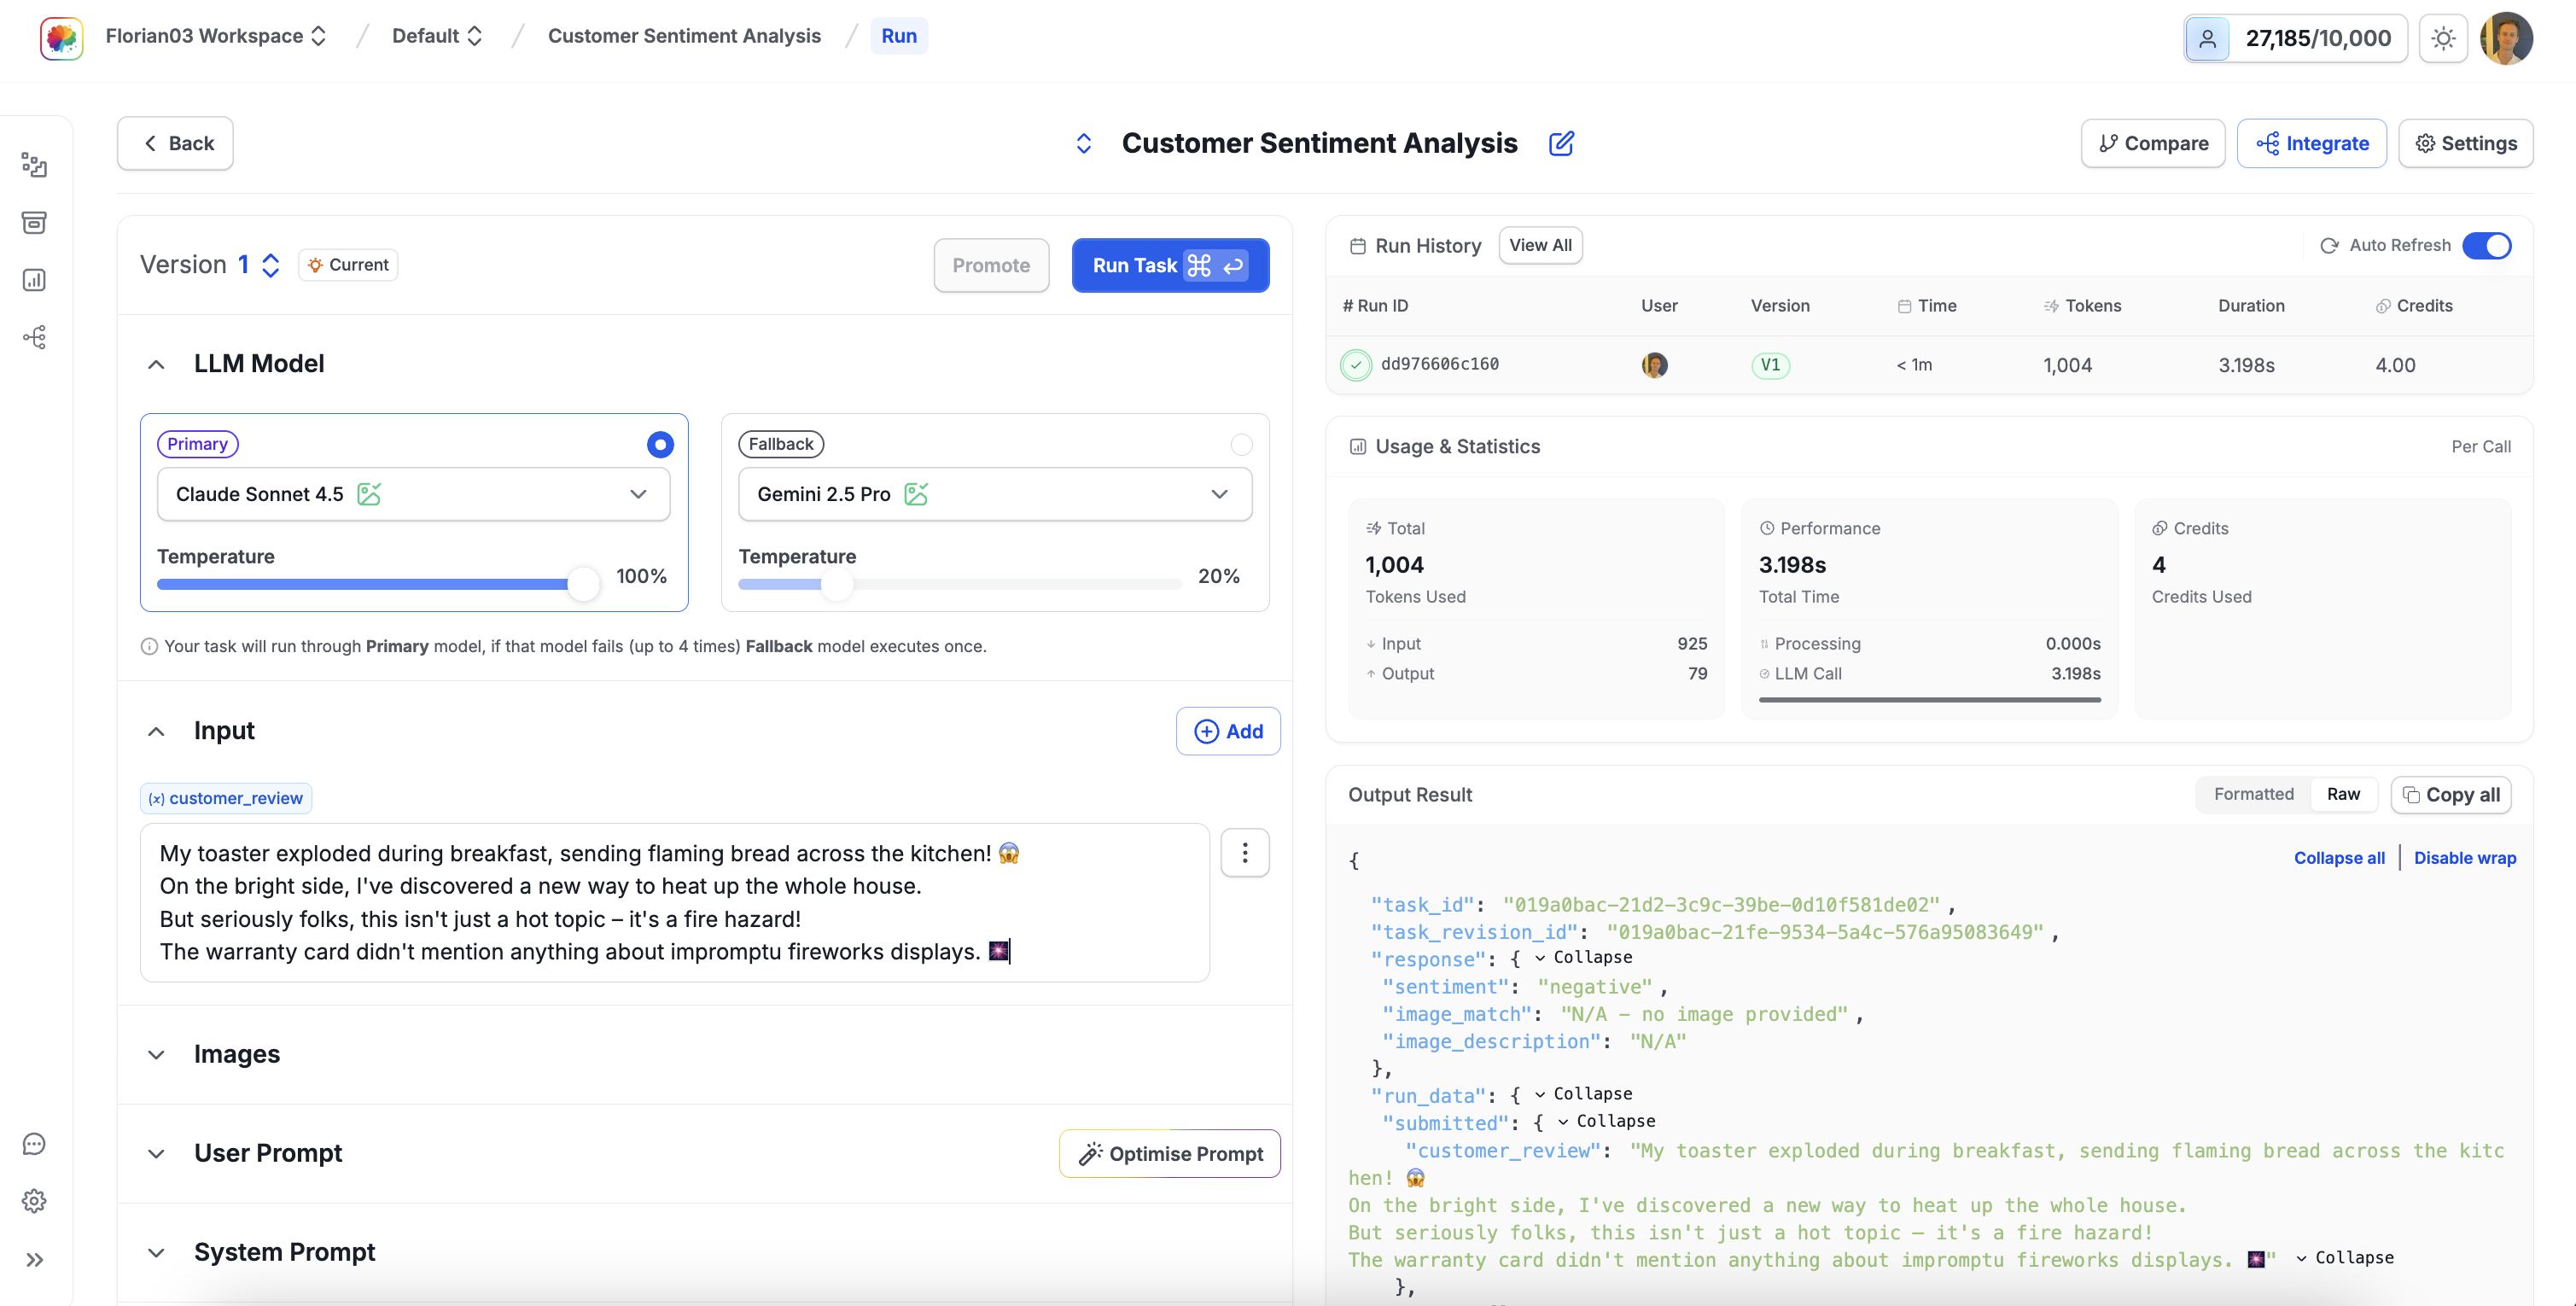
Let’s run through what you can expect to see in this view:
Left Panel
Right Panel
Configuration & Inputs
- LLM model selection - primary and fallback
- Input fields for your variables
- Image upload for vision tasks
- User & system prompts
- Output format schema
Understanding Input Variables
Tasks are designed to run on dynamic input variables (e.g., {customer_review}). The platform automatically detects these variables from your prompts and creates corresponding input fields.
Text Inputs
File Inputs
URL Inputs
Web Search
Plain Text Variables
- Direct text entry for string variables
- Support for long-form content
- Special characters and emojis supported
- No size limit for testing
Example variables: {customer_review}, {product_description}, {user_query}
Multiple Input Types: Tasks can combine different input types. For example, a task might compare text to images, summarise documents with web content, or analyse URLs alongside uploaded files.
Providing Test Data
Text Input Example
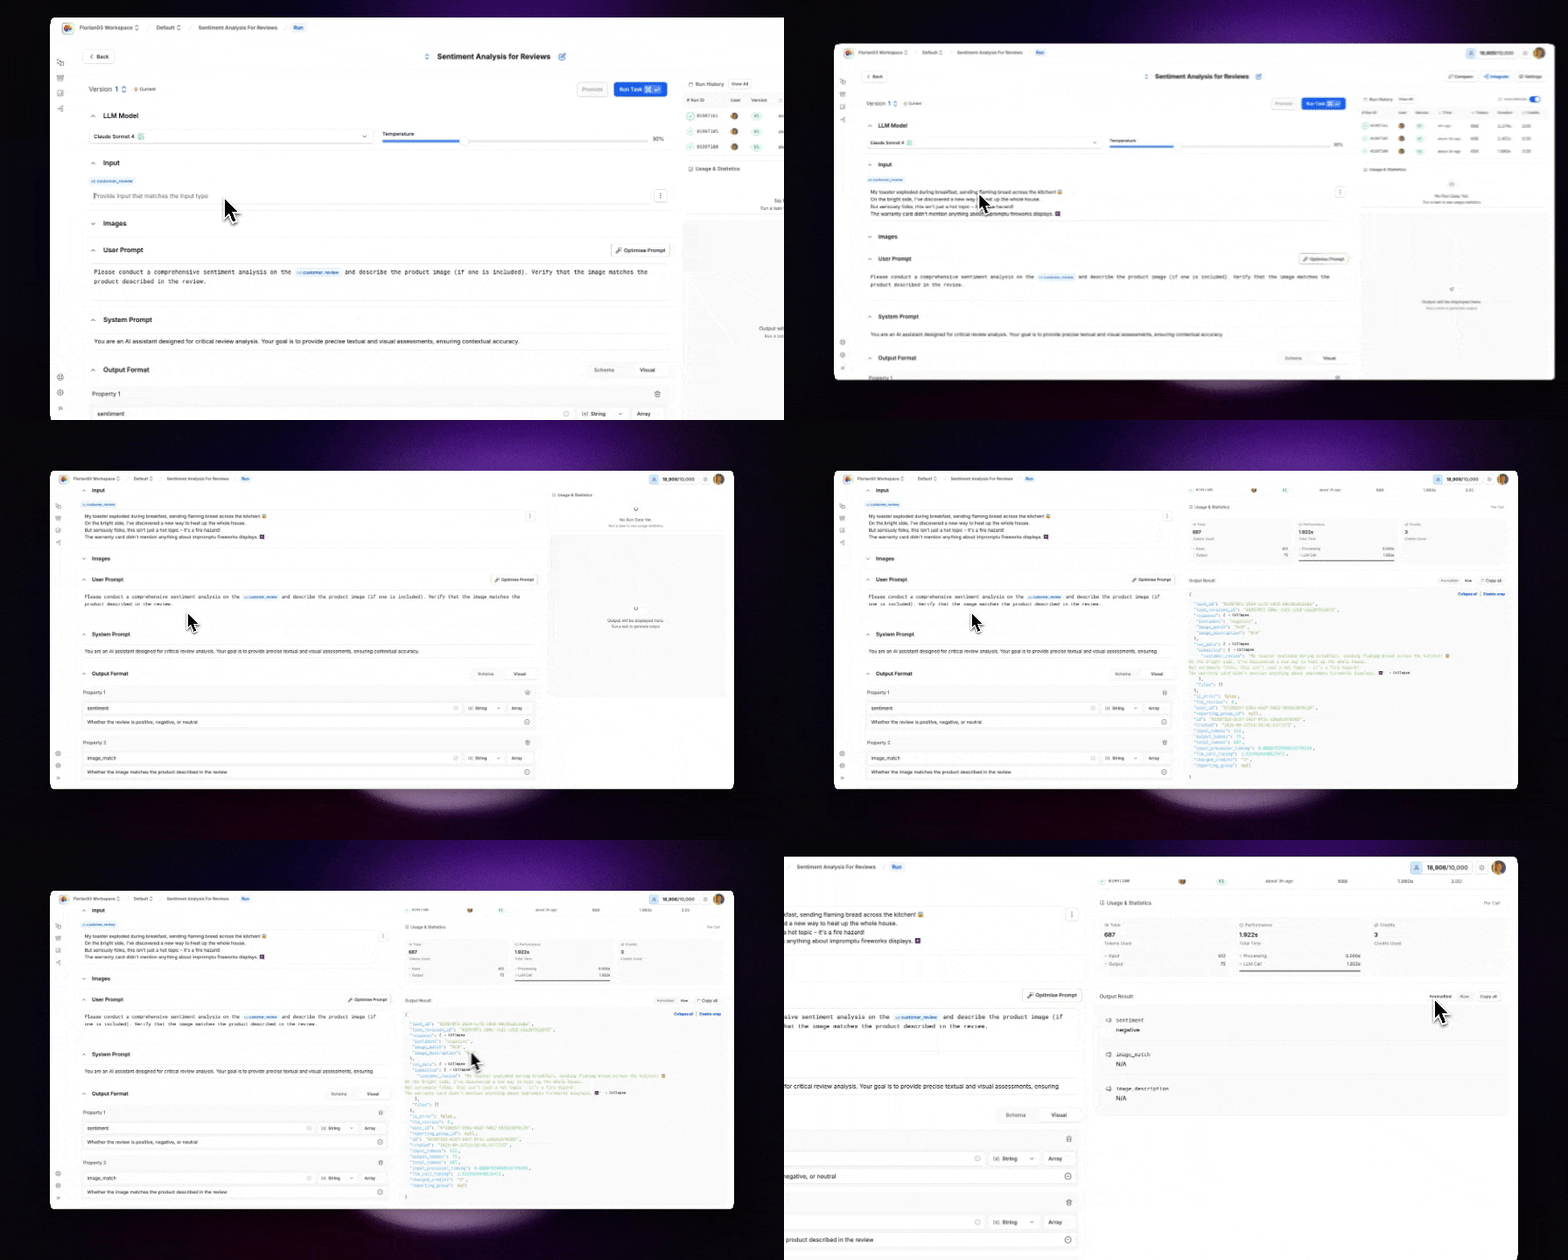
For our sentiment analysis task let’s provide a value for the input variable {customer_review}:
We simply hit Run Task and we’ll get a response:

Now let’s try adding an accompanying image:
Executing the Task
Running Your Test
Quick Execute: Press ⌘↩ on Mac or Ctrl+Enter on Windows to run your task instantly
Understanding the Response
Rendered View
Raw JSON
Metadata
User-Friendly Display
A formatted presentation of your outputs:
- Each field labeled clearly
- Values displayed with proper formatting
- Nested objects expanded
- Lists shown as bullet points
- Booleans as checkmarks/crosses
Best for quick validation and review.
